Following in the Footsteps of the Pioneering Professor Plum
Build Summary
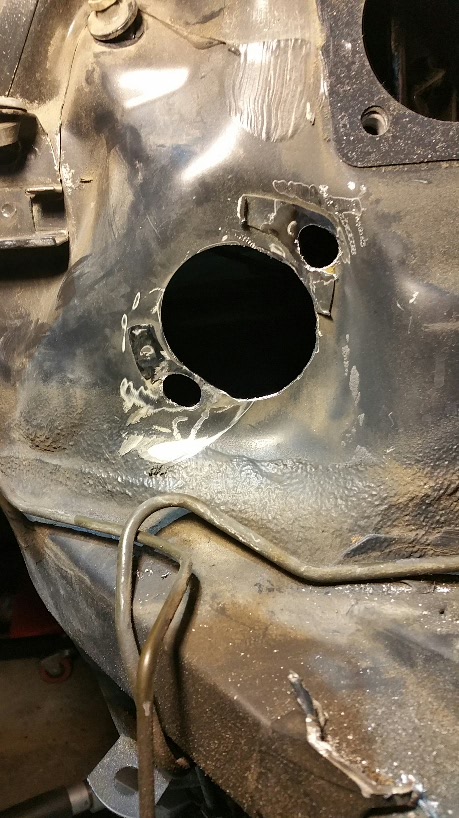
- Moved steering shaft on firewall end by ¼”
- Added a multi-knuckle steering shaft and run steering shaft under the 02 sensor
- Angle-milled the driver exhaust manifold .130″ off the back, and about .080″ off the front
- Cut .5″ off the corner of the collector flange, then drilled and threaded a new bolt hole
- Relocated ABS and extended wiring
- Cut out section of frame rail and repaired to allow for exhaust flange clearance
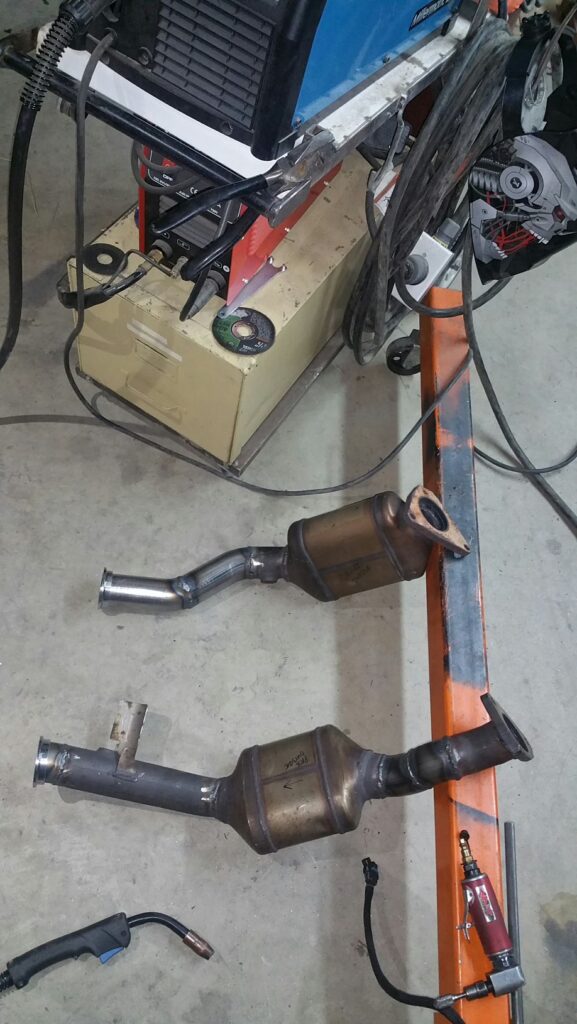
- Cut and reoriented catalytic converters to fit within 3” of original location with a short S-bend to snake around the starter
- GM AIR pump was attached to the BMW pump mount with some all-thread and some new holes drilled
- Made an aluminum heat shield from an old stop sign to shield the rubber fuel line running next to the catalytic converter
- Built a timer circuit to simulate the 50hz signal of the BMW BCM to communicate with the factory LS1 PCM calibration
- EVAP line spliced with 5/16 low pressure fuel line
- Purchased and installed CARB-approved K&N air intake for LS1 engine
- Fabricated some new mounts to drop the radiator a few inches and attached a flex-a-lite 16″ puller fan to the back of the radiator
- Obtained a printout from a Chevy dealer that says a factory tune for the 2002 Camaro is installed on PCM
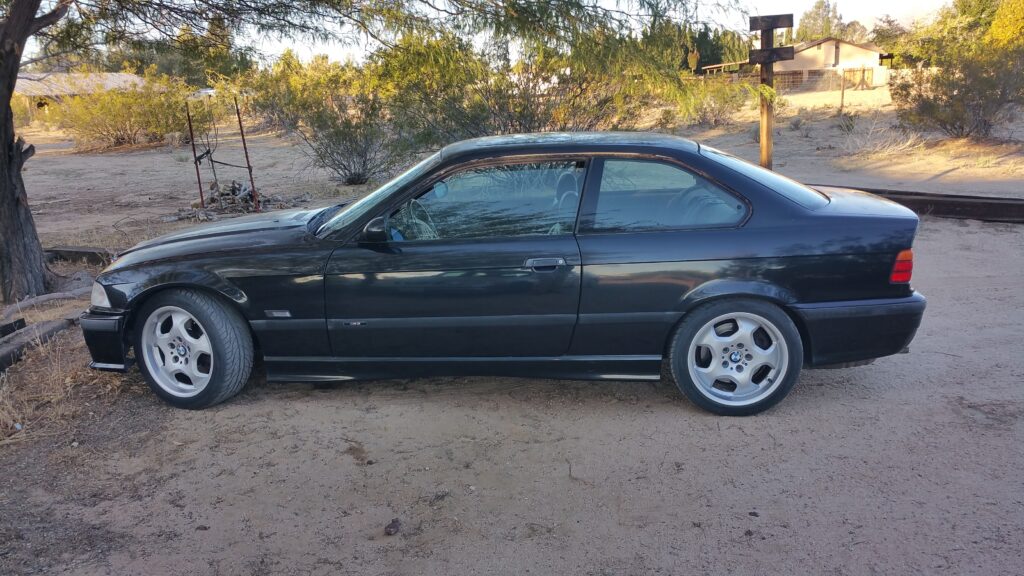
Professor Plum always wanted to build a BMW M3 California legal swap restomod. His rear wheel drive e36 M3 would enter the league of muscle cars with a more powerful engine. From his California Air Resources Board (CARB) BAR referee conversation, a California-legal e36 LS swap was possible yet time was running out. It may soon be illegal to do a California engine swap from different makes. All wiring harness connections to the stock LS1 PCM had to remain in their original form. He may advance the build’s tuning after passing smog inspection.
Engine and Transmission
Professor Plum found an LS1 engine and T56 transmission combo from a 2002 Camaro Z28 on Craigslist, although there were other LS crate engines that could have been used for this M3 engine swap.
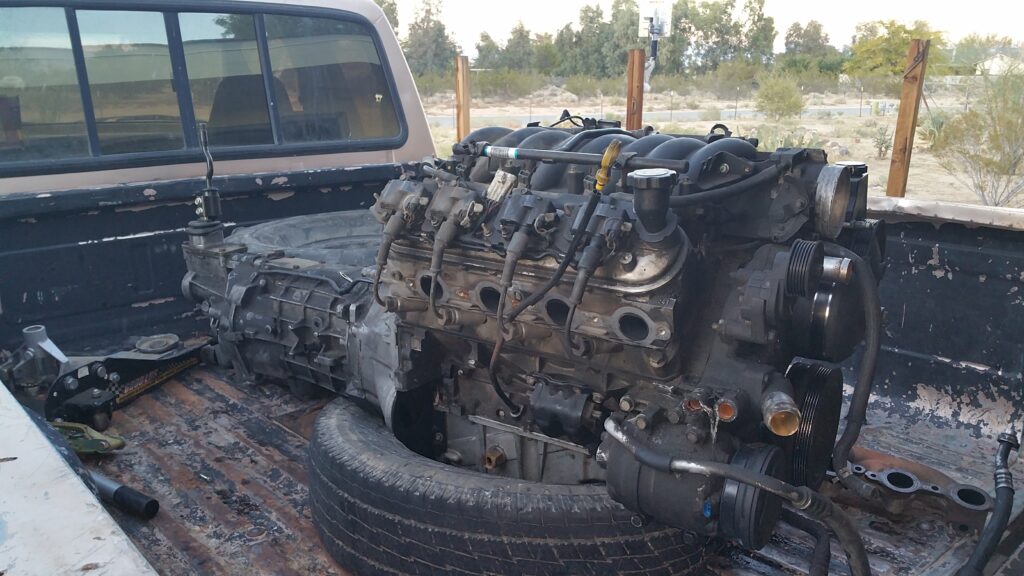

For his BMW e36 LS swap, he planned to install stock Camaro intake & exhaust manifolds, catalytic converter (cats), and emission controls. The exhaust presented a challenge as it interfered with the steering shaft. Building a 3-joint steering shaft around the exhaust overcame this problem.
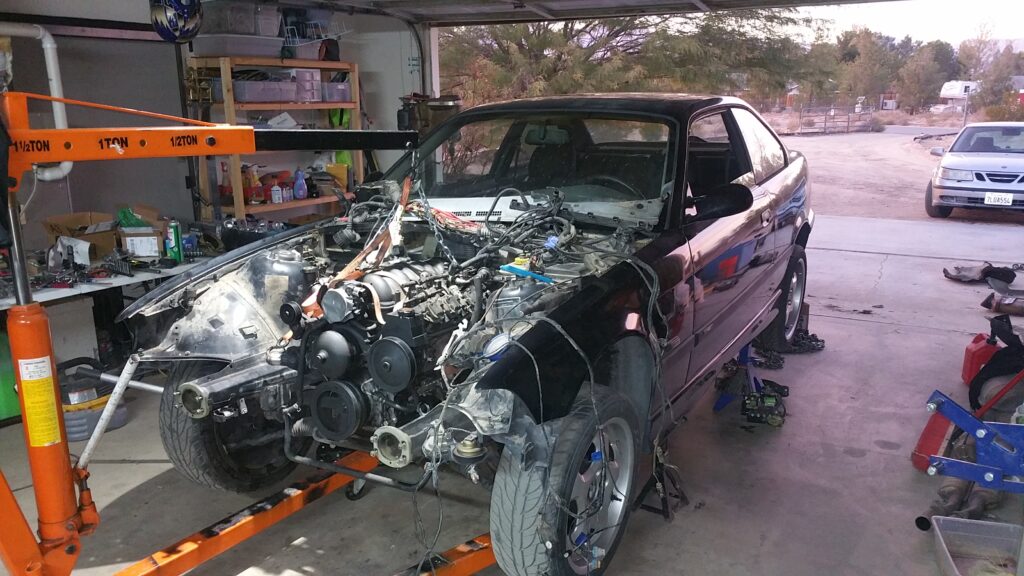
The installed engine sits on motor mounts and trans x-member sourced from CXRacing, a supplier of engine swap kits.
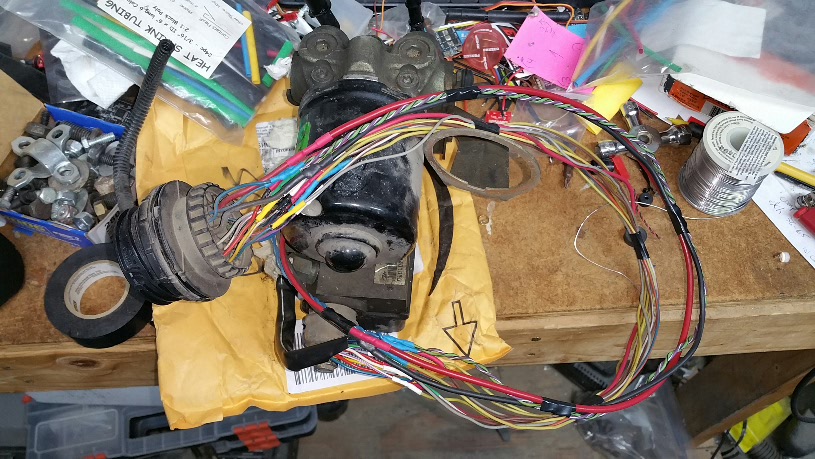
Relocating the ABS System
Professor Plum needed to relocate the antilock braking system (ABS) by extending the wiring 22” with twisted pair wire from an old vehicle speed sensor (VSS) harness.
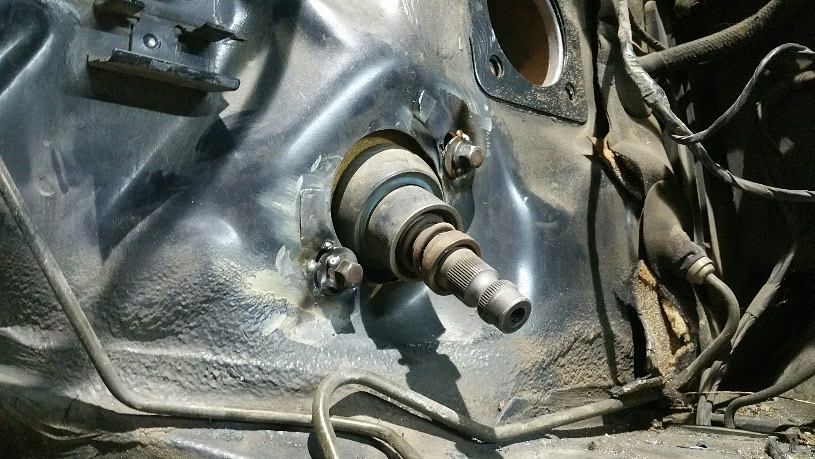
Rebuilding the Steering Shaft
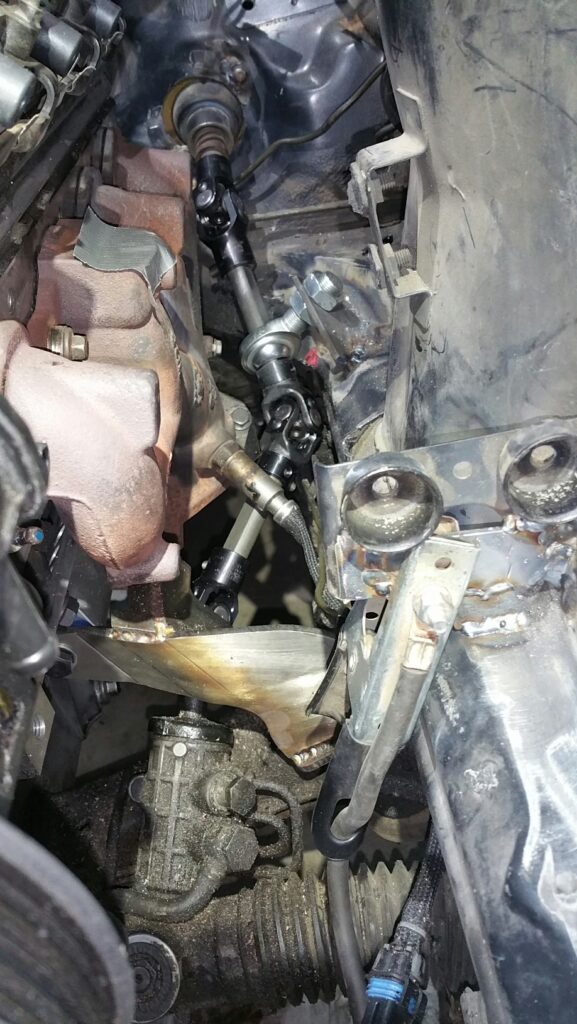
He sourced the universal steering joints (u-joints) from Flaming River. There was a tight fit around the exhaust manifold so he moved the firewall-end of the steering column ¼” towards the driver. He tacked new bolts to the firewall and dropped the engine back in to mock up the steering shaft.
Given that the BAR referee wouldn’t allow a relocated O2 sensor, the Professor had two options: 1) run the steering shaft over the sensor, or 2) run the steering shaft under the sensor. Running the shaft over the O2 sensor resulted in steep u-joint angles. Going under the sensor was tight, with the exhaust header collector flange interfering with the center u-joint during acceleration engine torque.

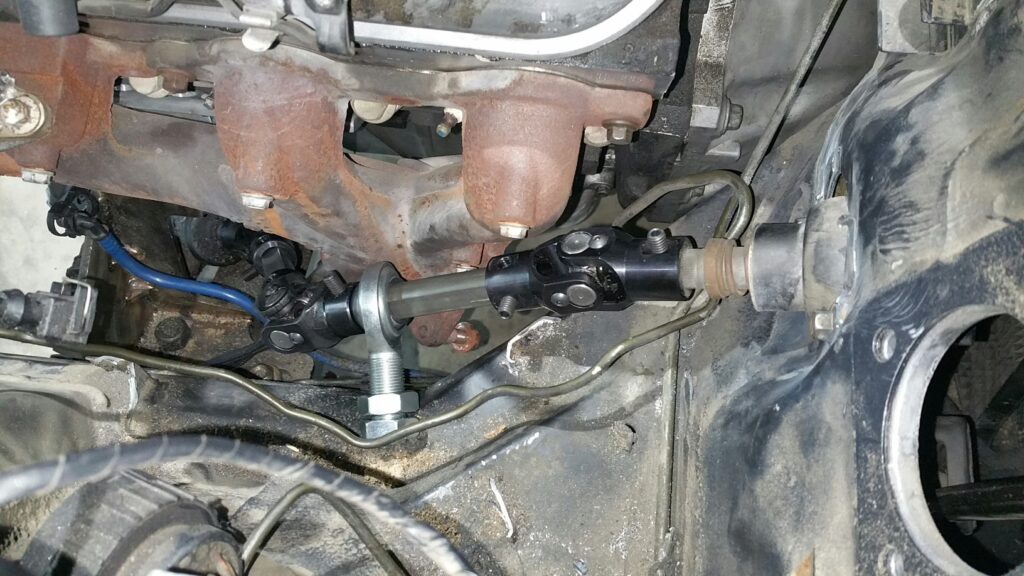
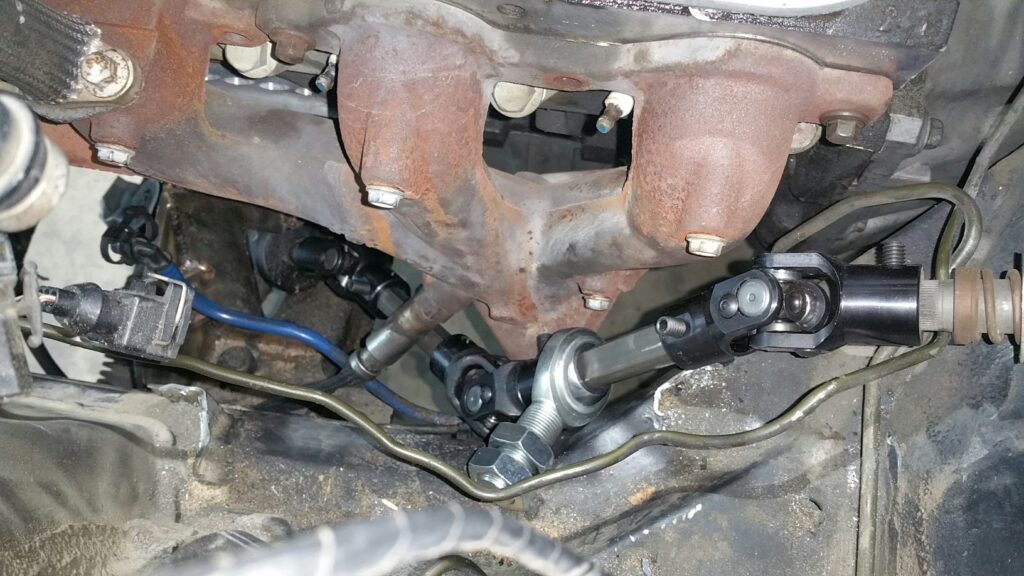
He opted to run the steering shaft under the 02 sensor by milling 0.125″ off the manifold-head surface and cutting 0.5″ off the corner of the collector flange, drilling and threading a new bolt hole.
Exhaust and Catalytic Convertors
Professor Plum didn’t want to weld a new O2 bung to the cast manifold so he worked around it, using stock Camaro cats and making his own exhaust, mating with the stock BMW muffler.
He angle-milled the driver exhaust manifold, about 0.130″ off the back and about 0.080″ off the front. This helped the steering fit better, resulting in a nice gap around the u-joint at the steering column. Professor Plum has a CNC machine in his garage!
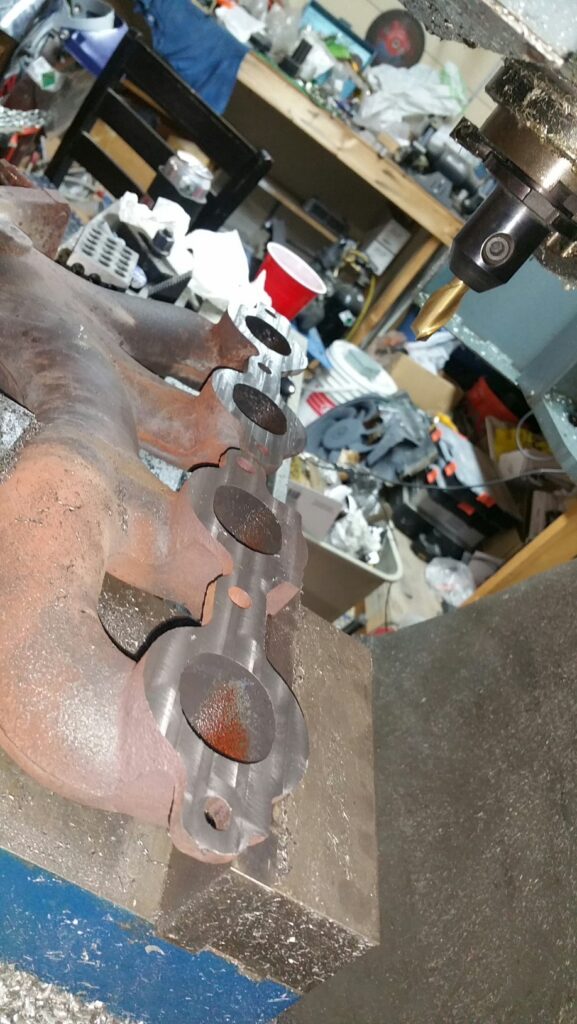
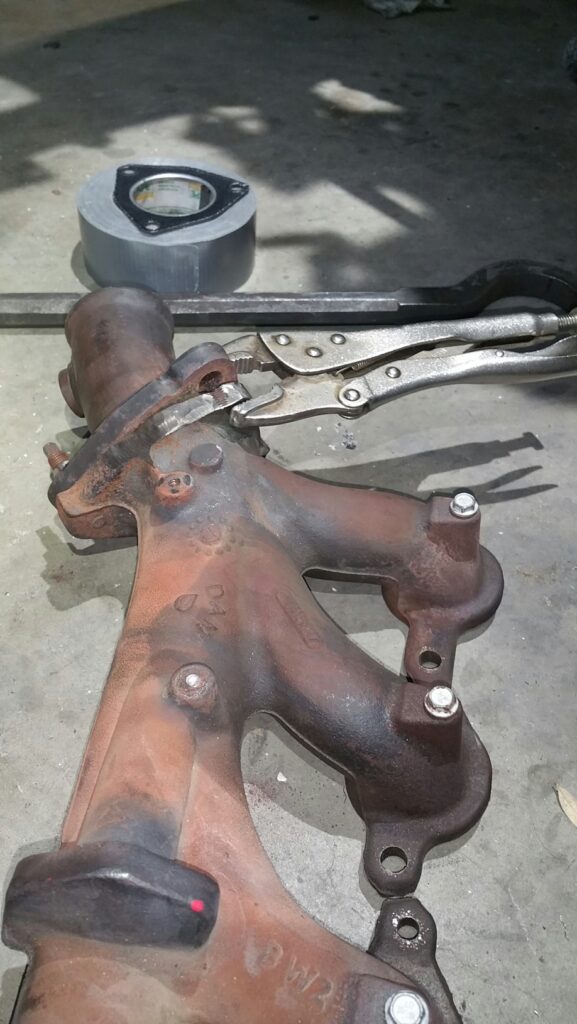
He milled 0.5″ off the outside of the collector flanges. New bolt holes were drilled and tapped. He also welded in the new ABS mounts.
He had to chop a section out of the passenger side frame rail for exhaust flange clearance as the engine is offset to that side a bit.
The catalytic converters required being cut off from flanges and angled slightly.
Professor Plum doubted anyone has made it past a BAR referee with headers missing an EO number. A smog shop, maybe, but the refs know their stuff. He did this in a way that could be passed anywhere. Everyone saying it couldn’t be done with stock manifolds made him want to prove them wrong.
He used a segment of an old driveshaft (0.083” wall) to box in the frame, cutting a notch in it to weld to the inside center portion of the frame rail.
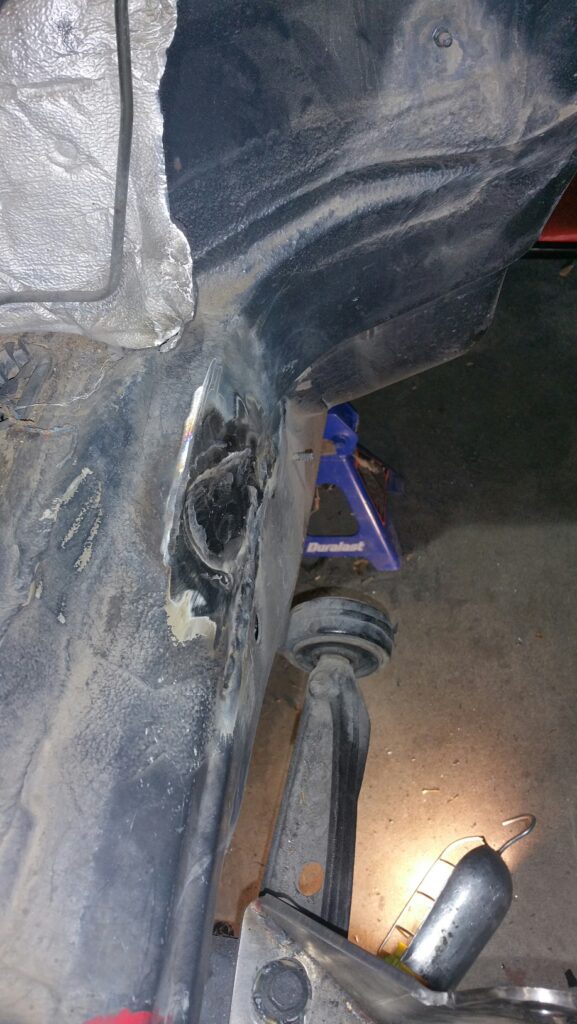
Both catalytic converters were cut off from their surrounding tubing and re-attached to fit in the car. A short S-bend was required to snake around the starter. He may shorten up the pre-cat passenger side later, as the lowest bend hangs below the chassis by ¾”.
Driveline
The shifter was torn down, cleaned and re-lubed. A new mount was welded for centering.
The driveshaft was built by Performance Driveline in Bakersfield, CA within 2 days of dropping off the JTR flange. The driveshaft builder said that the JTR flange was a Toyota flange.
A new fuel filter was installed with Dorman QD fittings and CARB-legal FI fuel hose. The EVAP line was spliced with a 5/16” low pressure fuel line.
The steering bearing mount got some reinforcement welded on and painted.
Professor Plum was concerned about a rubber fuel line right next to the cat, so he fabricated an aluminum heat shield from an old stop sign.
The ABS lines were extended with 20″ pieces.
The GM AIR pump was attached to the BMW pump mount with all-thread and new holes drilled. Apparently, as long as the catalytic converters are within 3″ of the original location it’s fine. The driver’s side was only rotated and looks factory. The passenger side is a couple inches longer pre-cat.
Air Filter Woes
Professor Plum built a timer circuit to simulate the 50hz signal of the BCM. It ran fine with the factory PCM calibration.
He completed the exhaust work and installed the full exhaust in the car using BMW fittings and hangers after the Camaro cats.
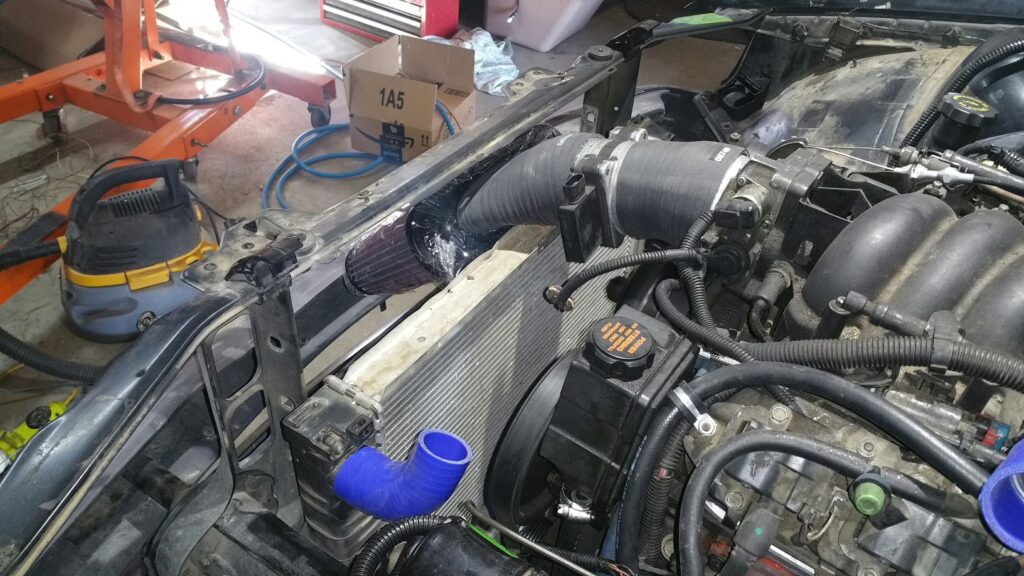
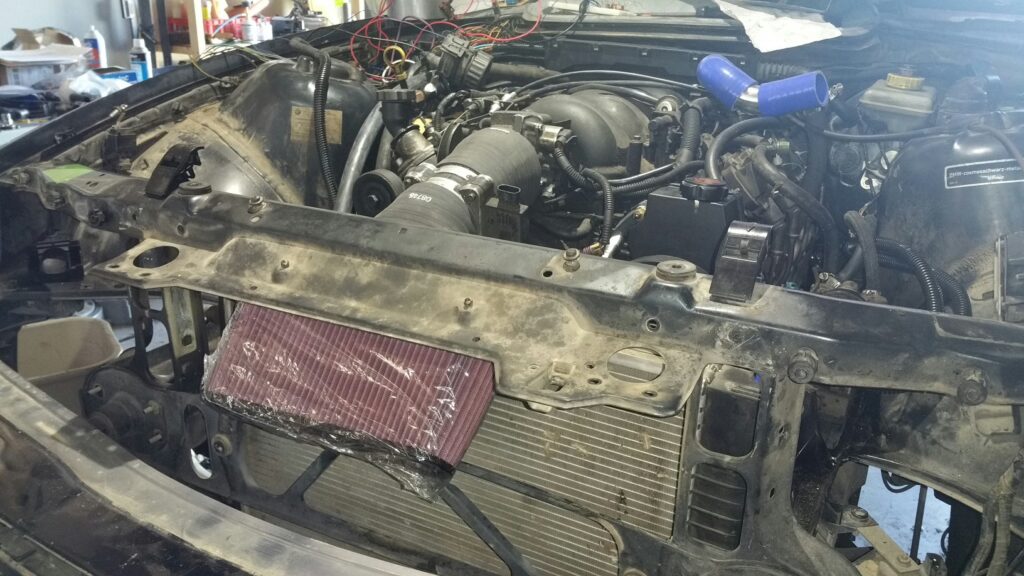

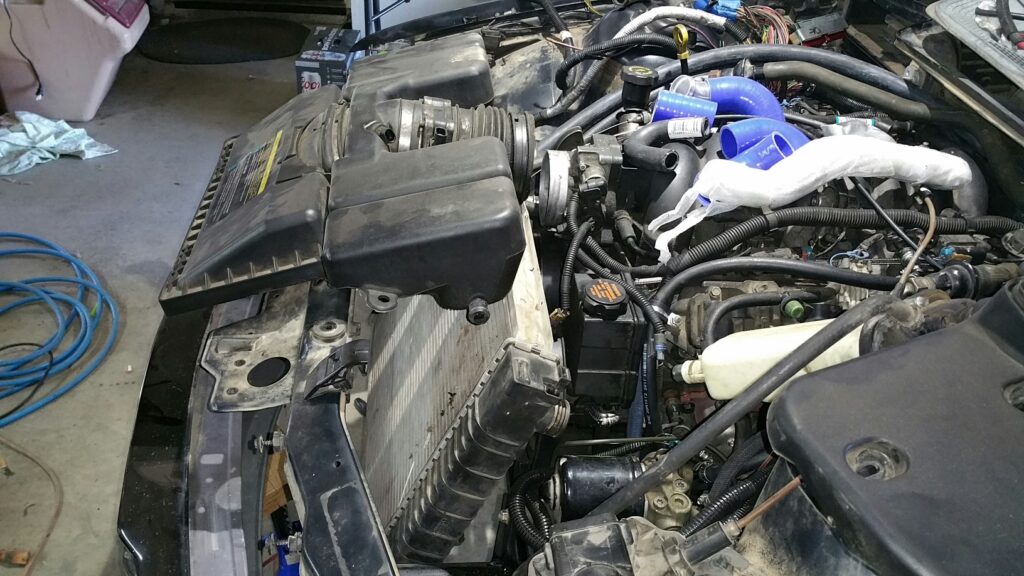
The Camaro air filter assembly did not fit. He bought a CARB-approved K&N that either had to go above the radiator core support temporarily for BAR testing, or drop the radiator to go under. He called the Bar Referee again to see if he could come in without a hood, and they said no. They enacted a rule for that as too many Jeep LS swaps were coming in without hoods or without a fender to fit one of the stock truck intake systems.
For the cooling system, he fabricated new mounts to drop the radiator a few inches and attached a flex-a-lite 16″ puller fan to the back of the radiator. There was no way to make the BMW one fit nicely in front.
The BAR referee requires a printout from a Chevy dealer stating factory tuning. Several phone calls later, Professor Plum finally found a GM dealer willing to connect their equipment to the build.
The first test failed only due to the catalyst monitor not ready. On engine changes, all monitors have to be ready/passed. He drove many cycles and miles but couldn’t get the monitor to show complete.
Plum went to the BAR referee station to see what else was wrong. Initially, the referee didn’t like the extended catalytic converter piping, although it was within the 3″ allowable position, and the referee agreed after further inspection. No other problems identified.
Catalyst Monitor
Professor Plum did a good deal of research into the Mode $06 data on the catalyst monitor. There are portions of the catalyst test that gather data during deceleration fuel cutoff (DFCO). He did a single cold-start drive cycle spending 7 minutes at 55 to 60mph in 5th gear, then coasted down to idle while in gear, making sure to get some time in DFCO. He repeated this 3 times without shutting off the car and pulled back in his driveway to find all monitors complete!
He went to the BAR referee for a second time. The alternator stored a hidden P1637 Code- Alternator L-terminal. He never thought to check codes before going in. No codes are allowed to be present.
He cleared the codes and reset the computer. Plum ran 2 drive cycles as described previously, and all monitors were ready again.
Finally a Pass from the BAR Referee
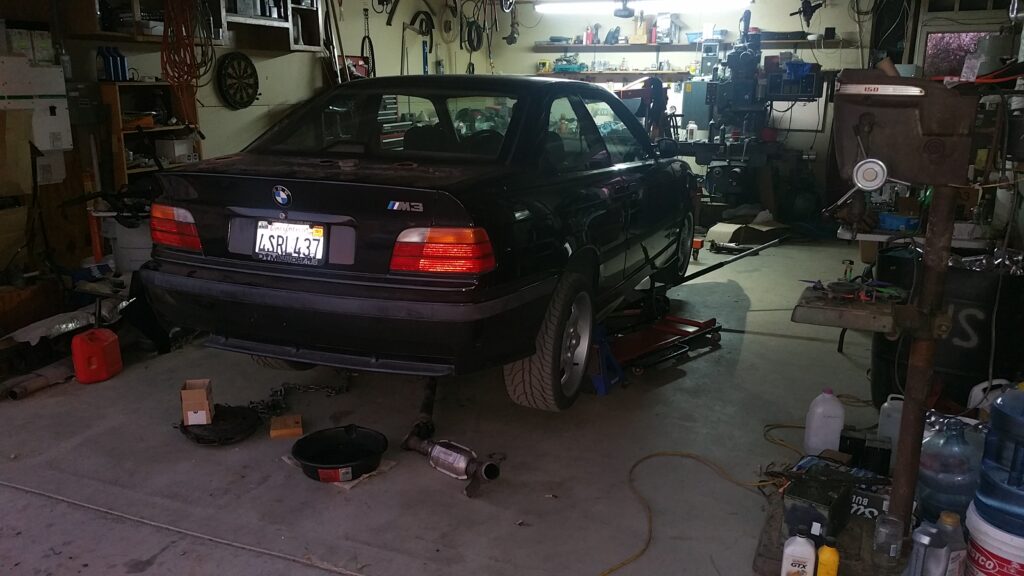
The car passed and Professor Plum received his engine change decal.
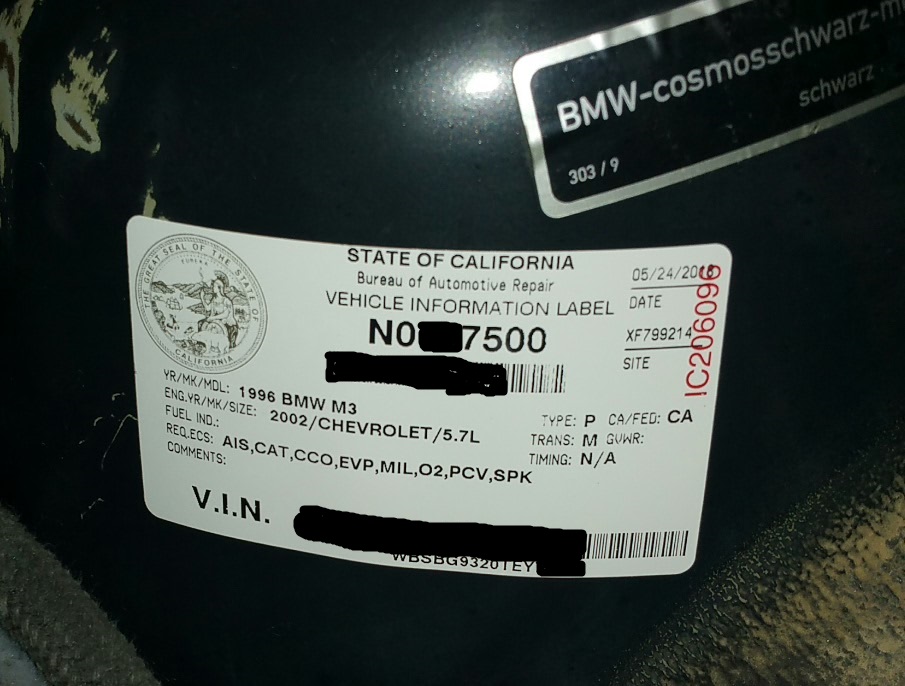
The rules have changed slightly regarding engine changes. The cats are now allowed to be up to 6″ further back from stock location. Engine swaps are required to be dyno tested under load. Fortunately, the BAR ref received approval to grandfather Plum without dyno testing.
Professor Plum proved that he could do a California legal engine swap.
Summary of the Changes to Pass CARB and Get the EO# for Engine Swap
This is the summary of changes for Profplum build using the 2002 Camaro LS1 engine and T56 transmission:
- Moved steering shaft on firewall end by ¼”
- Added a multi-knuckle steering shaft and run steering shaft under the 02 sensor
- Angle-milled the driver exhaust manifold .130″ off the back, and about .080″ off the front
- Cut .5″ off the corner of the collector flange, then drilled and threaded a new bolt hole
- Relocated ABS and extended wiring
- Cut out section of frame rail and repaired to allow for exhaust flange clearance
- Cut and reoriented catalytic converters to fit within 3” of original location with a short S-bend to snake around the starter
- GM AIR pump was attached to the BMW pump mount with some all-thread and some new holes drilled
- Made an aluminum heat shield from an old stop sign to shield the rubber fuel line running next to the catalytic converter
- Built a timer circuit to simulate the 50hz signal of the BMW BCM to communicate with the factory LS1 PCM calibration
- EVAP line spliced with 5/16 low pressure fuel line
- Purchased and installed CARB-approved K&N air intake for LS1 engine
- Fabricated some new mounts to drop the radiator a few inches and attached a flex-a-lite 16″ puller fan to the back of the radiator
- Obtained a printout from a Chevy dealer that says a factory tune for the 2002 Camaro is installed on PCM